How to Build a Frame for a Do-It-Yourself Sauna Kit
Buying a do-it-yourself sauna kit is a great way to save money and get the right heater, wood, accessories and design for your home sauna. You don’t have to settle for less or opt for a cheaper modular sauna.
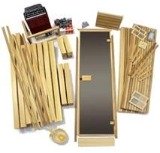
You can order a basic do-it-yourself home sauna kit that comes with a pre-hung door, pre-built benches, the heater and everything you need. Your job is to build the frame to accommodate the tongue and groove panels.
Getting Started
The installation time will vary depending on your do-it-yourself abilities as well as the size and location of the outdoor sauna. Altogether, with building the frame, wiring, and assembly of the kit, a sauna project could take as long as 16 hour or more.
The do-it-yourself sauna kit, however, will save you quite a bit of time and money over building a custom design or one made from scratch.
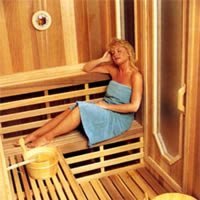
Once you have the location mapped out, your first consideration is the foundation, whether it’s an outdoor sauna cabin or a do-it-yourself indoor sauna kit installation. Next, consider other requirements such as height clearance and access for any future repairs or maintenance. If the foundation and clearance are no problem, you can start framing.
Most local building codes will require pressure treated lumber any time there is contact with a concrete floor. To build the sauna’s frame to accommodate the do-it-yourself kit, you will need regular and pressure treated 2x 4’s to build the studs (the vertical wood frame of the wall), furring strips, and heat-proof insulation.
Each wall will be built of a skeleton of vertical 2-by-4 studs that stand between the horizontal 2x4 base and top plates.
In a nutshell, here are the steps to build a frame for the do-it-yourself sauna kit:
- Cut the base plate using pressure-treated 2x4's
- Cut the top plate to match the bottom plate
- Mark both plates identically for the stud placements
- Frame the sauna walls on the ground or the floor surface before you tilt them up once they are finished.
- After the walls are up, make sure they are at a perfect square or rectangle with four 90 degree angles at each corner. Measure diagonally across the wall from corner to corner in a large “X”. If the measurements are different, take a hammer and tap the end of the top plate until the wall is square. Don’t forget to frame a rough opening for the door.
- Use unbacked insulation to avoid creating a double barrier when you staple the foil barrier to the walls.
Keep in mind that an indoor do-it-yourself sauna kit must be built on a waterproof surface such as concrete, tile, linoleum, etc.
An outside sauna cabin will need a sturdy frame structure, exterior wood treated for weather, a roof, and must be built on a concrete slab or reinforced deck.
Infrared Saunas
Sauna Heaters
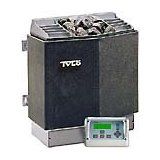
How to Install a Wood Sauna Heater
Sauna Kits
Buying Guide
