How to Build Your Own Infrared Sauna
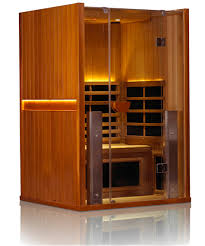
To build your own infrared sauna is not difficult and can save you a lot of money over the purchase of a far infrared ray (FIR) sauna cabinet.
The most important point to keep in mind is that the FIR emitters need to be placed “just so” in the room so they can effectively provide the infrared wavelengths you seek.
Requirements for Building Your Own Infrared Sauna
Any small room (5' x 5') where you can install two stand alone FIR heaters can be turned into an infrared sauna; or you can build an enclosure or cabinet that will be permanent.
If you build your own enclosure for the infrared sauna, the choice of wood can be poplar, cedar, spruce, fir, birch, or Douglas fir. Stay away from knotty pine which will release sap and anything like plywood or cheap paneling since they contain glues that could release toxins when heated.
Also, remember that when you build your own infrared sauna that you should not treat any interior wood with stains or varnish as the heat could also release toxins.
The easiest way to ventilate the infrared sauna is to leave a small gap under the door. If you build a special enclosure, you’ll also need an outtake vent which should be on an opposite wall, about 2/3s of the way up.
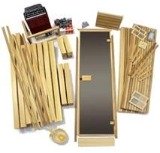
Either way, one of the best sources for DIY kits and heaters is Sunlighten saunas. They offer everything you need from high quality low EMF heaters, digital keypads, power supply, lighting and Grade A western red Canadian cedar wood, as well as various options.
Note: Choose "Sauna Talk" on the contact form or mention us on the phone for special discounts on your DIY sauna kit!
Ceramic Emitters are Best
The only type of emitter you should consider are ceramic FIR emitters. A low wattage concave ceramic emitter produces the optimal infrared wavelengths well within the proper micron range for deep body penetration.
Stay away from cheap carbon emitters with big metal grills - that infrared ray isn’t going anywhere since it is reflecting off the metal and back into the housing unit.
Note: When building your own infrared sauna you do not have to use insulation but you can still install it to help keep the temperature from fluctuating.
A bathroom infrared sauna can take 45 minutes or longer to heat up compared to 10 minutes for a pre-built infrared sauna cabin.
The Infrared Emitters
Basically, if you’re going to build your own infrared sauna in a bathroom or large closet, you’ll be placing two 500 watt emitters on either side of the room, about five feet apart.
It will require a 20 amp outlet or the use of an extension cord to split the load between a pair of 15 amp outlets. Once the heaters are heated you sit on a towel on the floor (naked of course) between the two heaters.
One emitter should be aimed at the front of your body core for the best detox since infrared travels only in a straight line.
Another Alternative
You can turn a bathroom into a home infrared sauna with no construction work at all. This is a more inexpensive alternative.
The main advantage if you are going to build your own infrared sauna versus purchasing a pre-built sauna cabinet is the cost - and it’s substantial; you’ll save 50% to 80% or more by building it yourself.
Featured Sauna Building Guide
The Modern Sauna and Related Facilities
The ultimate guide to planning, building and owning a home sauna.
Infrared Saunas
Sauna Heaters

How to Install a Wood Sauna Heater
Sauna Kits

Buying Guide


